Shadowsocks as a server on Windows
Before you read this post, familiarize yourself with the basics of running a proxy server on a home PC. These basics are explained in Helping friends in foreign countries. Most of that post applies to all home proxy servers, even if the clients are in the same country as you.
You can then proceed to install Shadowsocks as a server on your PC.
We use Windows as a sample client in the last part of this tutorial.
Decisions
Decide whether your clients will access your PC by IP address or by DNS name.
In the examples in this post, we have used the DNS name alice.cscot.buzz.
Decide on the protocol(s) your server will support. Shadowsocks can support both TCP and UDP.
We will support both TCP and UDP in our examples.
Decide which port number clients will use to connect to your Shadowsocks server as follows. Open Windows PowerShell and issue the command:
1 | Get-Random –Minimum 10000 -Maximum 42767 |
We will use port 14816 as our example.
Decide on a strong password as follows. Copy and paste into PowerShell the following script, which is taken from the blog https://www.sharepointdiary.com/2020/04/powershell-generate-random-password.html:
1 | Function Get-RandomPassword |
Now call the function to generate a random password of 32 characters:
1 | Get-RandomPassword -PasswordLength 32 |
If you get a result with a double-quote in it (ASCII code 34), then try again, as double-quote would mean end-of-field when it appears in the JSON configuration file.
Our example will be:
1 | @oyTFb7e:C$8Ui6IL2!z1]`Qqg53J40< |
Close Windows PowerShell.
Open your PC’s firewall
We are using tcp/14816 and udp/14816 for client input.
You should have already opened these protocols and ports on your router and forwarded them to your PC, as explained in the article on the basics.
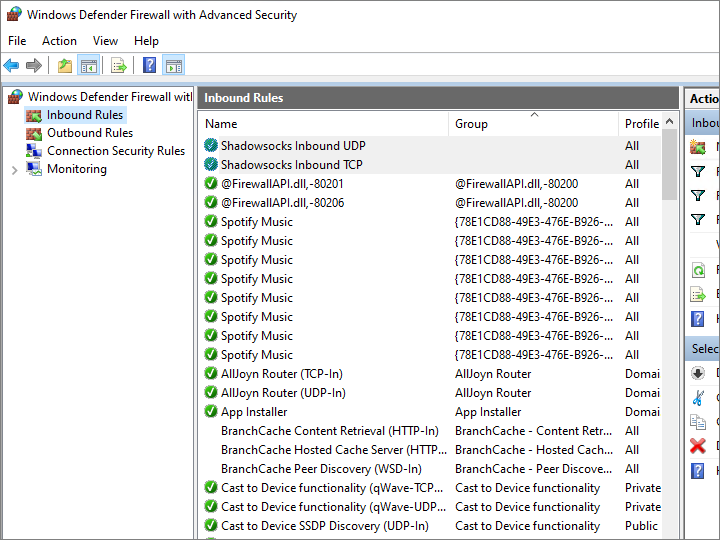
Now open these port for input in your Windows PC firewall like this:
- In the Windows search box, type
firewall. - Select Windows Defender Firewall with Advanced Security.
- In the left pane, select Inbound Rules.
- In the right pane, select New Rule.
- Type is Port. Click Next.
- Type is TCP, and specific local port as
14816. Click Next. - Action is Allow. Click Next.
- Leave all domains checked. Click Next.
- Set the Name to
Shadowsocks Inbound TCP. - Click Finish.
Repeat the above process to open for udp/14816, and name the new rule Shadowsocks Inbound UDP.
When you are done, close Windows Defender Firewall with Advanced Security.
Download the Rust version of Shadowsocks for Windows
Open a browser and visit https://github.com/shadowsocks/shadowsocks-rust/releases.
Download the latest release of the Rust version of Shadowsocks, compiled for Windows with the Microsoft Visual Studio compiler. Example:
1 | shadowsocks-v1.15.3.x86_64-pc-windows-msvc.zip |
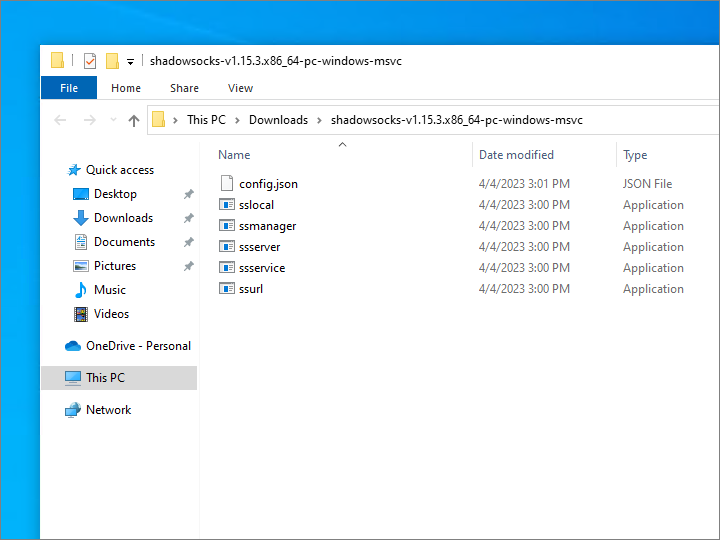
Unzip the .zip file. This gives you a folder named Downloads\shadowsocks-v1.15.3.x86_64-pc-windows-msvc with the Shadowsocks executables in it.
Create configuration file for Shadowsocks server
Use Windows Notepad to create the server configuration file config.json. Below is the recommended configuration for a Shadowsocks server, adapted from the blog post at https://gfw.report/blog/ss_tutorial/en/:
1 | { |
Save this file with the name config.json (with no .txt at the end of its name) in the same folder as the Shadowsocks executables. In our example, that folder is Downloads\shadowsocks-v1.15.3.x86_64-pc-windows-msvc.
Run Shadowsocks as a server
Open a Command Prompt window.
Navigate to your Shadowsocks folder:
1 | cd Downloads\shadowsocks-v1.15.3.x86_64-pc-windows-msvc |
Run Shadowsocks server:
1 | ssserver.exe |
Optionally add Shadowsocks as a startup program
Right-click on ssserver.exe and create a Shortcut to it, ssserver - Shortcut.
Open a Run command box by pressing Win+r.
Type shell:startup and press the Enter key to open the Startup folder.
Drag ssserver - Shortcut into the Startup folder.
Restart your computer to check that it works.
Install Shadowsocks for Windows on client
On the client PC, open a browser and visit https://github.com/shadowsocks/shadowsocks-windows/releases.
Download the most recent .zip file, e.g. Shadowsocks-4.4.1.0.zip.
Unzip the .zip file.
Configure Shadowsocks for Windows on client
Launch Shadowsocks.exe.
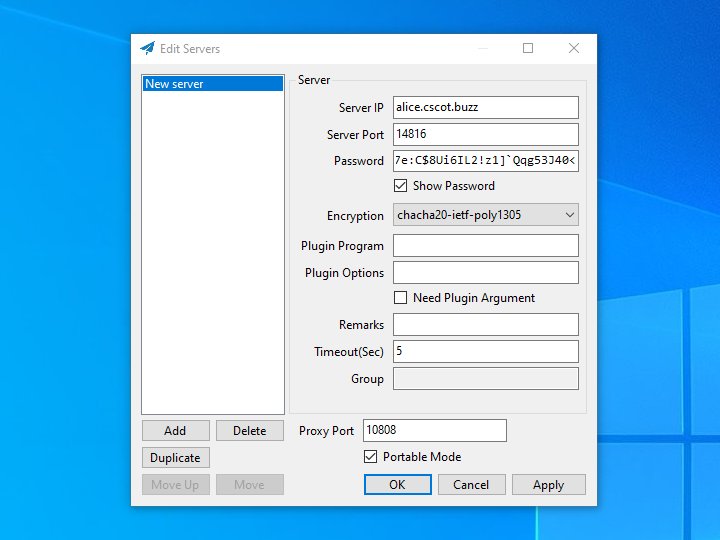
Add your server. Continuing with our example, the field values would be:
| Field | Value |
|---|---|
| Server Addr | alice.cscot.buzz |
| Server Port | 14816 |
| Password | @oyTFb7e:C$8Ui6IL2!z1]Qqg53J40<` |
| Encryption | chacha20-ietf-poly1305 |
| Plugin Program | Blank |
| Plugin Options | Blank |
| Remarks | Optional |
| Timeout (Sec) | 5 |
| Group | Blank |
| Proxy Port | 10808 |
Click Apply.
Click OK.
Right-click on the Shadowsocks icon in the system tray, and set the System Proxy to Global.