How to Host a Tor Obfs4 Bridge on Windows
Yes, it is possible to host a Tor obfs4 bridge on a Windows PC. Here’s how.
Decisions
You have a couple of decisions to make before you set up an obfs4 bridge.
- Is this intended to be a public bridge or a private bridge? A public bridge can be used by strangers all over the world, whereas a private bridge is just for you and your friends or co-workers.
- Which port numbers will you use? You’ll need two ports, one for communicating with the rest of the Tor network (the
ORPort), and one for accepting input from your obfs4 bridge users (theServerTransportListenAddr).
In the rest of this article, we’ll use as our examples:
9167as theORPort9168as theServerTransportListenAddr
Home PC considerations
To be useful to users over the long term, you’ll need a more or less static IP address from your Internet service provider (ISP). It doesn’t have to be technically a “static” IP, but it does need to remain unchanged for months or years at a time.
Your ISP must not provide you with Internet service over Carrier-Grade NAT. CGNAT is a variant of Network Address Translation that is used by internet service providers (ISPs). CGNAT allows multiple customers to share a single, public IP address. You, on the contrary, must have your own IP address that is just for your household.
You must also have control over your home router. On that router, you need to know how to open ports and how to set up port forwarding. Your ORPort and your ServerTransportListenAddr need to be open and forwarded to the PC that’s going to host your obfs4 bridge. In both cases, the protocol to forward is TCP only. Consult the manual for your router to learn how to do this.
Finally, you must leave your PC permanently switched on, and you must configure Windows Settings so that your PC never goes to sleep.
Open Windows Firewall
- In the Windows search box, type
firewall. - Open Windows Defender Firewall with Advanced Security.
- In the left pane, click Inbound Rules.
- In the right pane, click New Rule.
- Add a Port rule to open port
9167/tcp, and name itTor Bridge ORPort. - Add a Port rule to open port
9168/tcp, and name itTor Bridge ServerTransportListenAddr. - Close Windows Defender Firewall with Advanced Security.
Get set up for signature verification
Download the GPG for Windows installer from https://www.gpg4win.org.
Right-click on the installer, select Properties, then select the Digital Signatures tab. Check the signature against the one displayed on the page https://www.gpg4win.org/package-integrity.html.
If the signatures match, run the installer. Accept the installer’s defaults. This includes the installation of the Kleopatra graphical user interface for Gpg4win.
Run Kleopatra.
Click Lookup on server. Search for the key with fingerprint 0xEF6E286DDA85EA2A4BA7DE684E2C6E8793298290. Kleopatra should find the Tor Browser Developers (signing key) for email address torbrowser@torproject.org. Select and import the Tor Browser Developers (signing key).
Note: If Kleopatra cannot find the key, then you can manually download it from https://keys.openpgp.org/vks/v1/by-fingerprint/EF6E286DDA85EA2A4BA7DE684E2C6E8793298290 and Import it yourself.
After successful import, right-click on Tor Browser Developers (signing key), and select Certify.
You will be prompted to create your own OpenPGP certificate. Follow the instructions to Create a certificate for yourself.
After doing that, you can click Certify for the Tor Browser Developers (signing key).
Download Tor Expert Bundle
Create a new directory, C:\tor.
In your browser, visit https://www.torproject.org/download/tor.
Download the latest Tor Expert Bundle for Windows (x86_64) and the corresponding signing key. Here are some examples of the file names you will see:
tor-expert-bundle-12.0.4-windows-x86_64.tar.gztor-expert-bundle-12.0.4-windows-x86_64.tar.gz.asc
In Kleopatra, click Decrypt/Verify.
Select the signature file (the one with .asc on the end of its name).
You should see the result Valid signature by torbrowser@torproject.org.
Download the 7-Zip installer from https://7-zip.org. Run the installer to install 7-Zip.
Right-click on tor-expert-bundle-12.0.4-windows-x86_64.tar.gz and use 7-Zip to extract it.
Now right-click on the inner archive, tor-expert-bundle-12.0.4-windows-x86_64.tar, and again use 7-Zip to extract it.
This creates folders data and tor.
Now copy the entire folders data and tor and all their contents into C:\tor.
Download obfs4proxy
In your browser, visit https://www.torproject.org/download/languages.
Download the 64-bit Windows installer and the corresponding signature file. Here are some examples of the file names you will see:
torbrowser-install-win64-12.0.4_ALL.exetorbrowser-install-win64-12.0.4_ALL.exe.asc
In Kleopatra, click Decrypt/Verify.
Select the signature file (e.g. torbrowser-install-win64-12.0.4_ALL.exe.asc with .asc on the end of its name).
You should see the result Valid signature by torbrowser@torproject.org.
Now run the installer. In our example, that is the application named torbrowser-install-win64-12.0.4_ALL.exe.
You can uncheck the box to run Tor Browser.
After the install is complete, the folder on your desktop Tor Browser\Browser\TorBrowser\Tor\PluggableTransports contains an application named obfs4proxy.exe.
Copy obfs4proxy.exe into C:\tor\tor (i.e., the same folder as your main tor.exe application).
Update July 2, 2023
tor2: Hi, I’m attempting to follow the instructions for setting up a obfs4 bridge on Windows. In my instance, it is Windows 10. The instructions say to copy out the obfs4proxy.exe from: C:\Users
trinity-1686a: Hi, For reasons not totally clear to me (something related to meek and uTLS I think?) TorProject forked obfs4. To disambiguate with Yawning’s obfs4, the project was renamed to lyrebird. It should work the same as obfs4.exe for your use case. Would you mind creating a ticket in The Tor Project / Web / community · GitLab, or possibly a Merge Request, to update the documentation?
Install Tor as a service
Open a Command Prompt window with the option Run as administrator.
Issue the command:
1 | C:\tor\tor\tor.exe --service install |
You should see messages:
1 | Running on a Post-Win2K OS, so we'll assume that the LocalService account exists. |
Configure Tor
Open Notepad with the option Run as administrator.
Create a torrc file, modeling the contents on the samples below.
Save the finished torrc file as C:\Windows\ServiceProfiles\LocalService\AppData\Roaming\tor\torrc (with no extension). You’ll need to have the option checked to view hidden items to see AppData folders.
In Windows File Explorer, check the box to view file extensions. See if Notepad has saved your torrc with .txt on the end. If so, rename the file so that there is no .txt on the end. It should be just torrc with no extension.
Sample torrc for public obfs4 bridge
1 | Log notice file C:\tor\tor\log.txt |
Sample torrc for private obfs4 bridge
1 | Log notice file C:\tor\tor\log.txt |
Restart Tor with new torrc
In the Windows search box type services, and open the Services app with the option Run as administrator.
Select the service Tor Win32 Service.
Stop and then Start the service.
Find your obfs4 bridge line
Your folder C:\Windows\ServiceProfiles\LocalService\AppData\Roaming\tor should contain a folder pt_state. Within that is a file obfs4_bridgeline.txt that shows your obfs4 bridge line.
Example before substituting in values for placeholders:
1 | Bridge obfs4 <IP ADDRESS>:<PORT> <FINGERPRINT> cert=Umj6a5ICzeNEHHx11MDeGk4fqnLM5I4EJHCmXv+T6LwwpryqAfWf7+tx8e/Fz0ktZUZXJw iat-mode=0 |
The <IP ADDRESS> is the public IP address of your PC, which in a typical home set-up is actually the public IP address of your home router.
The <PORT> in our example is 9168.
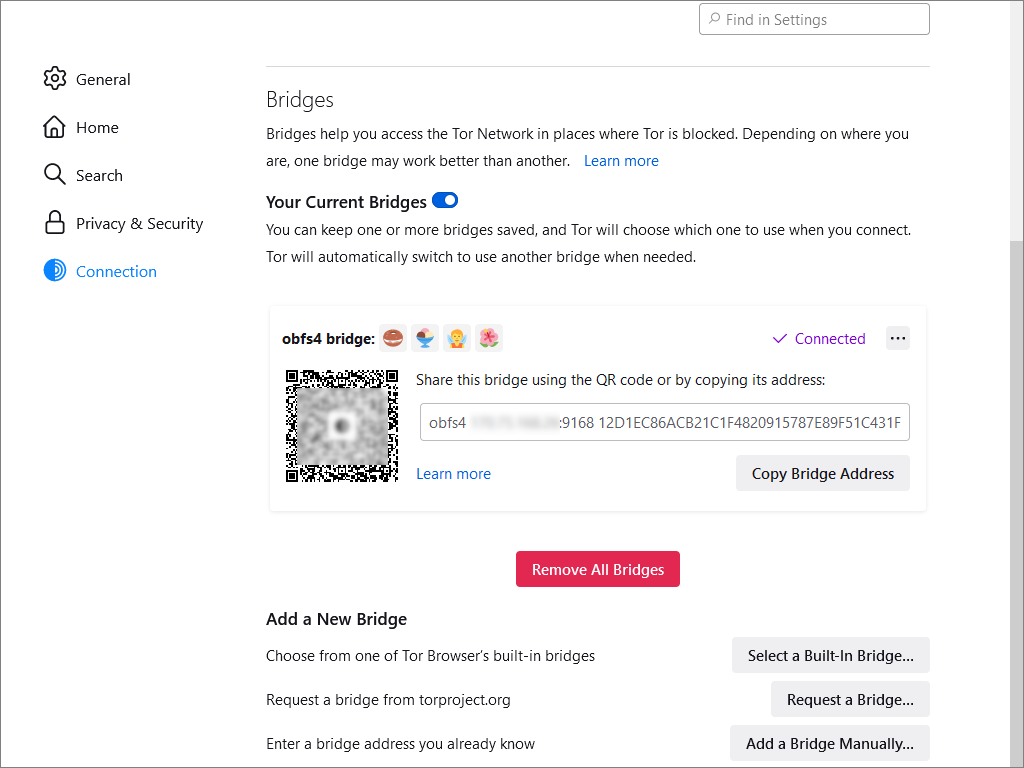
The <FINGERPRINT> (e.g. 12D1EC86ACB21C1F4820915787E89F51C431F284) is shown in the log file C:\tor\tor\log.txt. Example:
1 | Your Tor server's identity key fingerprint is 'ChooseNameHere 12D1EC86ACB21C1F4820915787E89F51C431F284' |
Test your bridge
Test your access to the Tor network, using your bridge, from a PC outside your home network.
If you have any problems, see if you can telnet to your bridge IP address and port.
Also check the log file C:\tor\tor\log.txt for messages.
Publicize bridge
A public bridge is automatically distributed to anonymous users by the Tor Project.
For a private bridge, you must manually distribute the obfs4 bridge line to your friends or co-workers. You must also explain to them how to configure their Tor Browser to use your obfs4 bridge line.