Example of V2Ray with meek
V2Ray version 5.7.0 introduces the possibility of using meek transport protocol.
Meek is a censorship-resistant protocol that encodes traffic as plain HTTP requests and responses. This allows traffic to penetrate environments where it would otherwise be blocked.
The performance of meek is low. It is not intended for situations where you want a speedy ping or to transfer gigabytes and gigabytes of data. Meek is intended for situations where most other protocols are blocked and you need a last resort.
This post gives an example of configuring V2Ray with meek.
With thanks to @xiaokangwang and to David Fifield, the developer of the original implementation of meek.
VPS
You will need your own virtual private server or VPS.
We will run Ubuntu 22.04 on the demonstration VPS. This server has 1 GB of RAM.
Domain name
You will need your own domain name. Our examples will use the domain name:
1 | cscot.buzz |
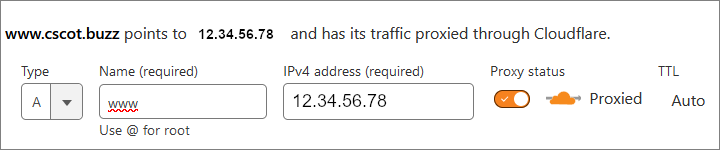
Create a DNS A record pointing from the hostname of the server to the IP address of the server. Our example:
1 | www.cscot.buzz |
Universally unique id
On Linux servers, you can generate a UUID with the command:
1 | uuidgen |
Alternatively, generate a UUID on the web by visiting https://www.uuidgenerator.net.
Example:
1 | f48fd3ae-0c24-433e-af3b-e87338b74705 |
Path
Generate a secret path:
1 | < /dev/urandom tr -dc a-z | head -c${1:-8};echo; |
Example:
1 | vrezdxop |
Linux server
If your server is protected by a firewall or your cloud provider’s security groups, open ports 80/tcp and 443/tcpfor input.
Switch to the root user.
Install a web server:
1 | apt update && apt upgrade |
Edit the web server’s default site configuration file /etc/nginx/sites-available/default.
Insert the real hostname.
Also insert a proxy_pass line for the secret path.
Example of completed default site configuration file:
1 | server { |
Restart the web server with this configuration:
1 | systemctl restart nginx |
Install snapd if it is not already installed:
1 | apt install snapd |
Ensure that your version of snapd is up to date:
1 | snap install core; snap refresh core |
Run the following command on the command line to install certbot:
1 | snap install --classic certbot |
Execute the following instruction to ensure that the certbot command can be run:
1 | ln -s /snap/bin/certbot /usr/bin/certbot |
Run the next command to get an SSL certificate and have Certbot edit your Nginx configuration automatically to serve the HTTPS version of your site:
1 | certbot --nginx --register-unsafely-without-email --agree-tos |
The certbot packages on your system come with a cron job or systemd timer that will renew your certificate automatically before it expires. You can test automatic renewal by running the command below:
1 | certbot renew --dry-run |
If you are using Cloudflare CDN, visit the SSL/TLS page for your domain. Make sure your SSL/TLS encryption mode is set to Full (strict).
To confirm that your site is set up properly, visit:
1 | https://www.cscot.buzz |
in your browser and look for the padlock icon in the address bar.
Now you can install version v5.7.0 of V2Ray:
1 | bash <(curl -L https://raw.githubusercontent.com/v2fly/fhs-install-v2ray/master/install-release.sh) --version v5.7.0 |
Meek is only supported in JSON5 configuration format.
Therefore edit the server configuration file /usr/local/etc/v2ray/config.json based on the example below:
1 | { |
Edit the systemd service unit /etc/systemd/system/v2ray.service.
Make the ExecStart line look like this:
1 | ExecStart=/usr/local/bin/v2ray run -format jsonv5 -c /usr/local/etc/v2ray/config.json |
Save the file. Reload the systemd daemon:
1 | rm -rf /etc/systemd/system/v2ray.service.d/10-donot_touch_single_conf.conf |
Start V2Ray with the new configuration file:
1 | systemctl enable v2ray |
Windows client
Download the v5.7.0 zip file for Windows, v2ray-windows-64.zip, from https://github.com/v2fly/v2ray-core/releases/tag/v5.7.0.
Unzip the zip file.
User Notepad to edit the client configuration file, Downloads\v2ray-windows-64\config.json, based on the example below:
1 | { |
Open a Command Prompt window.
Run the V2Ray client with your configuration:
1 | cd Downloads\v2ray-windows-64 |
You should see messages that look like this:
1 | V2Ray 5.7.0 (V2Fly, a community-driven edition of V2Ray.) Custom (go1.20.4 windows/amd64) |
Leave the Command Prompt window open with V2Ray running in it.
The most convenient browser to use with a proxy server is Firefox. Therefore install Firefox now if you do not already have Firefox on your PC.
Open Firefox Settings.
On the General page, scroll down to Network Settings.
Configure Firefox so that the browser uses the V2Ray proxy:
- Select the radio button for Manual proxy configuration
- Set the SOCKS Host to
127.0.0.1 - Set the Port to
10808 - Select the version SOCKS v5
- Check the box for Proxy DNS when using SOCKS v5