Host a Tor Onion Service on Windows
Yes! You can host a Tor onion service (previously called a “hidden service”) on a Windows PC. Here’s how to create a blog without having to pay for hosting or a domain name.
Install Hugo on your PC
In this tutorial, you’ll build your blog using the Hugo static site generator.
Visit the Hugo releases page, https://github.com/gohugoio/hugo/releases.
In the section for the most recent release, scroll down until you reach the Assets subsection.
Download the archive for your chosen version, operating system, and processor. You want the “extended” version of Hugo, since it includes support for SCSS (a language that provides extra features for CSS). As an example, if the most recent release is 0.111.3, and if your PC runs Windows on a 64-bit processor, you would download:
1 | hugo_extended_0.111.3_windows-amd64.zip |
Extract the .zip file.
Make hugo executable like this:
- Create a new directory named
C:\hugo. - Copy the application
Downloads\hugo_extended_0.111.3_windows-amd64\hugo.exeinto the directoryC:\hugo. - In the Windows search box, type
env, and select Edit the system environment variables. - Click the button Environment Variables.
- Select Path, and click Edit.
- Click New, type
C:\hugo, and click OK. - Click OK.
- Click OK.
Now in the Windows search box, type cmd, and select the Command Prompt app.
Enter the command:
1 | echo %PATH% |
Make sure C:\hugo is listed as part of your execution path.
If all is okay, then enter the command:
1 | hugo version |
Make sure you see a version number referring to your installed version, e.g. hugo v0.111.3, etc.
Close the Command Prompt app.
Install Git on your PC
Git will be useful for installing Hugo themes and also if you ever want to back up your website content to a GitHub repository.
The official build is available for download on the Git website. Open a browser, and visit https://git-scm.com/download/win.
Download 64-bit Git for Windows Setup. The installer has a name such as Git-2.40.0-64-bit.exe.
Run the installer. Accept the defaults all the way through the installation.
When the installation is complete, go to the Windows search box, type cmd, and select the Command Prompt app.
Enter the command:
1 | git --version |
You should see a result such as:
1 | git version 2.40.0.windows.1 |
Start a Hugo site
In the Command Prompt app, start a new Hugo site named myonionblog (or another name of your choosing) by issuing the command:
1 | hugo new site myonionblog |
Change into the directory for your onion blog:
1 | cd myonionblog |
Initialize it as a Git repository:
1 | git init |
Leave the Command Prompt app open, positioned in the myonionblog folder.
Add a Hugo theme to your site
Tor Browser users often disable JavaScript. Therefore for an onion site, you are recommended to use a Hugo theme that renders without JavaScript. Some possible choices are hugo-xmin (556 stars), hugo-notepadium (327 stars), smol (171 stars), no-js-hugo-theme (18 stars), or hugo-theme-sk1 (18 stars).
We will use no-js-hugo-theme. Add it to your Hugo site by entering this command:
1 | git submodule add https://github.com/stevenengler/no-js-hugo-theme themes/no-js-hugo-theme |
Now use Windows Explorer to copy the entire contents of C:\Users\<YOUR-USER-NAME>\myonionblog\themes\no-js-hugo-theme\exampleSite up to myonionblog, replacing any existing contents that have the same name.
Test the site locally
In your Command Prompt app, still positioned in the myonionblog folder, issue the command:
1 | hugo server |
Open a browser, and navigate to localhost port 1313:
1 | http://localhost:1313 |
You should see the example site.
Close the browser.
Select the Command Prompt window, and press Ctrl+c on your computer keyboard to stop the Hugo server.
Execute Hugo with no arguments to generate the standalone public HTML:
1 | hugo |
This regenerates the contents of myonionblog\public.
Install a web server
So far, we’ve used the server that comes with Hugo. Now we’ll install the full-function Apache web server.
Open a browser, and visit https://www.apachefriends.org. Download XAMPP for Windows. At the time of writing it is version 8.2.0, which includes Apache 2.4.54. The installer has a name that looks like xampp-windows-x64-8.2.0-0-VS16-installer.exe.
XAMPP recommends that you disable User Account Control before running the installer. In your Command Prompt window, type:
1 | msconfig |
On the tab for Tools, select Change UAC Settings and click Launch.
Slide the slider all the way down to the lowest level, Never notify. Click OK. Click OK.
Now you can run the XAMPP installer, xampp-windows-x64-8.2.0-0-VS16-installer.exe.
On the Select Components screen, the only one that needs to remain checked is Apache.
Leave the installation folder at C:\xampp.
Configure Apache
On the XAMPP Control Panel, click the Config button for Apache.
In httpd.conf, change the document root to be your Hugo public HTML folder:
1 | DocumentRoot "`C:/Users/<YOUR-USER-NAME>/myonionblog/public" |
Save httpd.conf, and close Notepad.
On the XAMPP Control Panel, click the Start button to start Apache.
Note that this adds Windows inbound firewall rules for the XAMPP program. If your PC is behind a home router, it will typically not be open for traffic from the outside world due to the router’s own firewall.
Test the site under XAMPP by opening a browser on your PC and visiting the site on localhost port 80 (which is the default anyway):
1 | http://localhost:80 |
Close your browser.
Install Tor
Open a browser, and visit https://7-zip.org.
Download the installer for the 64-bit x64 version of 7-Zip for Windows. Run the installer. You’ll need 7-Zip in a moment to extract the Tor .tar.gz archive.
Create a new directory C:\tor.
In your browser, visit https://www.torproject.org/download/tor.
Download the Tor Expert Bundle for Windows (x86_64), placing the download in C:\tor. It will have a name such as tor-expert-bundle-12.0.4-windows-x86_64.tar.gz.
Right-click on tor-expert-bundle-12.0.4-windows-x86_64.tar.gz, and use 7-Zip to extract the archive.
Right-click on the inner archive tor-expert-bundle-12.0.4-windows-x86_64.tar, and again use 7-Zip to extract the archive.
Your folder C:\tor will now contain two additional directories: data and tor.
Run Tor
Open a Command Prompt window with the option Run as administrator.
Issue the command:
1 | C:\tor\tor\tor.exe --service install |
Configure Tor
Open Notepad with the option Run as administrator.
Create content like this:
1 | Log notice file C:\Windows\ServiceProfiles\LocalService\AppData\Roaming\tor\notice.log |
Save the file as C:\Windows\ServiceProfiles\LocalService\AppData\Roaming\tor\torrc (with no extension). You’ll need to have the option checked to view hidden items to see AppData folders. If Notepad saves your torrc file with .txt on the end, rename it so there is no .txt on the end of its name.
In the Windows search box type services, and open the Services app with the option Run as administrator.
Select the service Tor Win32 Service.
Stop and then Start the service.
Find your onion URL
Your folder C:\Windows\ServiceProfiles\LocalService\AppData\Roaming\tor now contains a folder myonionblog.
Inside this new folder is a file called hostname.
Open the file hostname with Notepad. It will look like this:
1 | gzbf3m6y4yxq5pbajk43bxasu4blyos6lfuukdiuigpvgtkxblryokqd.onion |
Close Notepad.
End-to-end test
Wait a few hours for the new onion URL to propagate.
Now go to a different PC. Open a browser and visit https://www.torproject.org/download. Install Tor Browser for Windows.
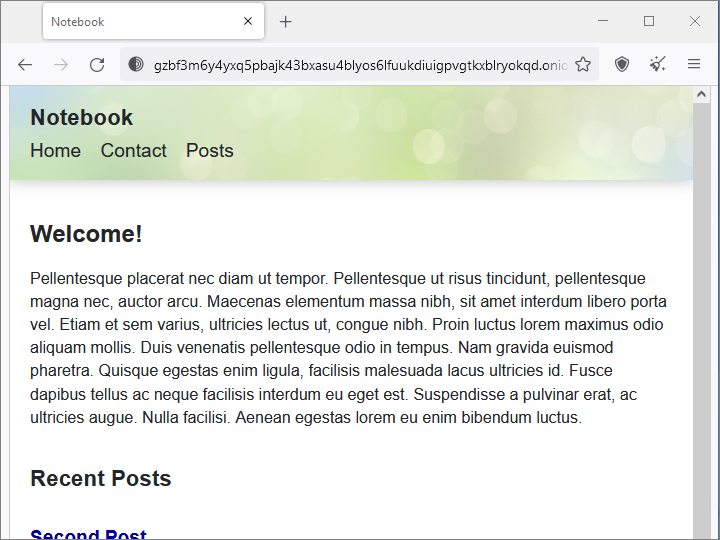
After the .onion URL has had time to propagate, visit your URL in Tor Browser on your second PC:
1 | http://gzbf3m6y4yxq5pbajk43bxasu4blyos6lfuukdiuigpvgtkxblryokqd.onion |
Promote your blog
At a minimum, submit your .onion URL to the onion search engine https://ahmia.fi.
Mainly you need to publicize your .onion URL to your friends and on your social media accounts.