NekoRay with Hysteria2
NekoRay version 3.20 adds support for Hysteria2.
NekoRay is a cross-platform GUI for managing connections to proxy servers. It is built on the Qt development framework for cross-platform applications. NekoRay currently supports Windows and Linux. Older versions supported macOS, but this was removed due to lack of a maintainer. If you are willing to fix and update the code, you are welcome to submit your Pull Request.
Hysteria2 uses a custom version of the QUIC (Quick UDP Internet Connections) protocol to deliver unparalleled performance over unreliable or lossy networks. The protocol is designed to masquerade as standard HTTP/3 traffic, making it difficult to detect and block without widespread collateral damage. Hysteria2 is almost a complete rewrite of the original Hysteria, with a new protocol and new features. Version 2 documentation is at https://v2.hysteria.network. Hysteria2 is not compatible with the original Hysteria, so users must choose either version 1 or version 2 for both client and server.
This post documents a procedure for using Hysteria2 on a Linux server and accessing it from a NekoRay client on Windows.
If you experience problems:
- For NekoRay problems, set the log level to debug (in Basic Settings) and create an issue on the GitHub Issues page.
- For Hysteria problems, see the Troubleshooting page, and if you still need support, go to the GitHub Issues page.
Hysteria2 server
The main installation instructions for Hysteria2 are at https://v2.hysteria.network/docs/getting-started/Installation. This demonstration uses material from https://github.com/chika0801/hysteria-install.
The server in this scenario has 1 GB of RAM and runs Ubuntu 22.04. It is assumed that you SSH into your server as root.
You will need a domain name and a DNS record pointing from your hostname to your server IP address. Our examples use vps.example.com as the sample hostname.
When using standalone mode to apply for or renew a certificate, the script will listen on port tcp/80. If port tcp/80 is occupied, the script will fail. Therefore nothing else should be listening on port tcp/80.
As well as opening port tcp/80 in your firewall, you will also need to open port udp/443 for the Hysteria server. Note that Hysteria uses UDP.
Set up the ACME script ready to request a free SSL certificate and private key from Let’s Encrypt:
1 | apt install -y socat |
1 | curl https://get.acme.sh | sh |
1 | alias acme.sh=~/.acme.sh/acme.sh |
1 | acme.sh --upgrade --auto-upgrade |
1 | acme.sh --set-default-ca --server letsencrypt |
Request a free Elliptic Curve Cryptography certificate for your hostname in standalone mode. Change vps.example.com to your real hostname in this command:
1 | acme.sh --issue -d vps.example.com --standalone --keylength ec-256 |
Install the SSL certificate and key to the /etc/ssl/private directory. Change vps.example.com to your real hostname in this command:
1 | acme.sh --install-cert -d vps.example.com --ecc --fullchain-file /etc/ssl/private/fullchain.cer --key-file /etc/ssl/private/private.key |
Force certificate renewal. Change vps.example.com to your real hostname in this command:
1 | acme.sh --renew -d vps.example.com --force --ecc |
Install the Hysteria program on your server:
1 | curl -Lo /root/hysteria https://github.com/apernet/hysteria/releases/latest/download/hysteria-linux-amd64 && chmod +x /root/hysteria && mv -f /root/hysteria /usr/local/bin |
Check the installation of Hysteria2 has worked:
1 | hysteria version |
Download the configuration template:
1 | curl -Lo /root/hysteria_config.yaml https://raw.githubusercontent.com/chika0801/hysteria-install/main/config_server.yaml |
Edit the configuration file. If you use the vi editor:
1 | vi ~/hysteria_config.yaml |
If you use the nano editor:
1 | nano ~/hysteria_config.yaml |
Change at least the TLS locations and the password. For example:
1 | listen: :443 |
Save the file.
Download the systemd service file:
1 | curl -Lo /etc/systemd/system/hysteria.service https://raw.githubusercontent.com/chika0801/hysteria-install/main/hysteria.service && systemctl daemon-reload |
Start the service:
1 | systemctl enable hysteria |
1 | systemctl start hysteria |
Check that Hysteria is active (running) on the server:
1 | systemctl status hysteria |
If necessary, check the log:
1 | journalctl -u hysteria |
Check that Hysteria is listening on port udp/443:
1 | ss -tulpn |
NekoRay client
Go to the NekoRay releases page on GitHub.
Download version 3.20 or later, e.g. nekoray-3.20-2023-09-07-windows64.zip.
Extract the archive to give a folder nekoray-3.20-2023-09-07-windows64\nekoray.
The first time you run nekoray.exe, you may see Windows Defender SmartScreen. Allow the program to Run anyway.
You are asked to decide whether you want to use Xray or sing-box as your core. Xray is widely used and has good compatibility with other protocols and clients. More new protocols are supported by sing-box, and in some cases these give better performance.
Since this scenario uses Hysteria2, choose sing-box as your core.
The GUI appears.
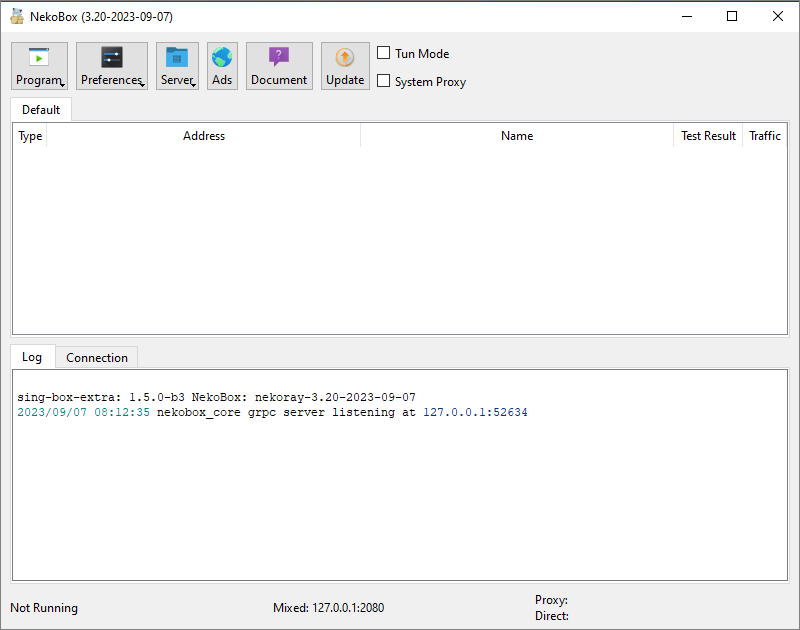
Look at the log pane at the bottom of the window. You need to see a message confirming you have at least sing-box-extra version 1.5.0 to support Hysteria2.
Notice that there is a Tun Mode and a System Proxy mode. You can enable either of these by checking the boxes at the top of the user interace. Tun Mode will proxy the traffic of the entire system, which is suitable for software that cannot or will not use the System Proxy. Browsers can use the System Proxy setting.
In this scenario, check the box for System Proxy.
If you want to check the proxy settings in NekoRay, go to Preferences > Basic Settings > Common, you will see that once you connect, a combined SOCKS and HTTP proxy will start listening on localhost port tcp/2080
Some other buttons to notice:
- Server is where we will add the server in a moment.
- Ads takes you to unscreened airport ads at https://matsuricom.pages.dev
- Document takes you to https://matsuridayo.github.io.
- Update attempts to update the software.
- You can reach the NekoRay context menu by right-clicking the NekoRay icon in the Windows system tray.
In the NekoRay GUI, select Server then New profile.
Add the details of your server:
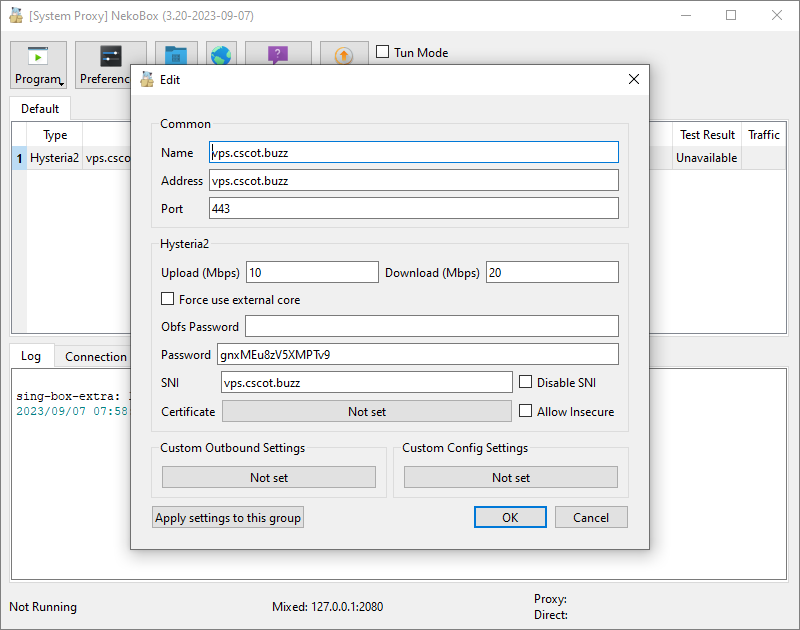
Click OK to add the new server profile.
Select the server’s row, and press Enter to start the connection.